[an error occurred while processing this directive] [an error occurred while processing this directive] [an error occurred while processing this directive] [an error occurred while processing this directive] Setting Connection to Remote Agent


Setting Connection to Remote Agent

This is an example of setting up Remote Agent connection using TCP/IP protocol.

  1. Run 24x7 Scheduler (normal interactive  mode) on the remote machine.
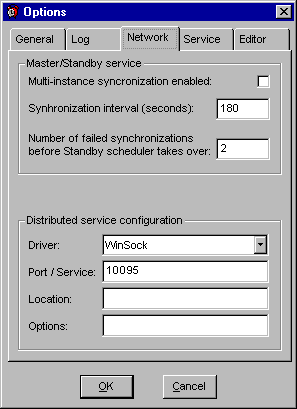
  2. Click Tools/Options menu, after the Options dialog appears, select Network tab page.
  3. Select Winsock driver, enter 1096 for the Port (or any other port number you want).
  4. Click the OK button, then choose the NO option when prompted to restart the Scheduler then exit the Scheduler.
  5. Start 24x7 Remote Agent. The agent is now ready to accept remotely submited jobs.
Options dialog, Fail-save tab

Now you can create a new Remote Agent profile on the computer where you have installed main 24x7 Scheduler (job processor)

  1. Run 24x7 Scheduler.
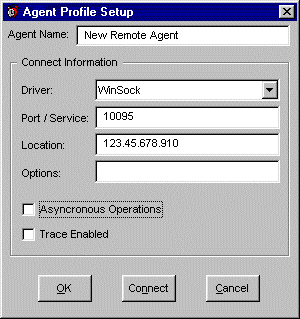
  2. Select Tools/Remote Agents menu. The Remote Agents dialog will appear. appears. Click the New button to add a new profile. The Agent Profile dialog will appear.
  3. Enter desired Remote Agent name (any descriptive text up-to 30 characters long).
  4. Select Winsock driver, enter 1096 for port (or any other port number you want).
  5. In the Location field specify name of IP address of the Remote Agent computer.
  6. Optionally, click the Connect button to test connectivity to the Remote Agent.
  7. Click the OK button, then click the Close button on the Remote Agents dialog.
  8. Modify properties of jobs that you want to execute on the remote computer. From the Host drop-down list select name of the Remote Agent created earlier.
Agent profile dialog